Wednesday, October 13, 2010

WPF DataGrid Entity Framework 4.0

Tags: WPF, DataGrid, Entity Framework, Detached

When I populate the datagrid with linq + entity framework for example

myModel context = new myModel();
myDataGrid.ItemsSource = from a in context.Apples select a;

and then you create a new record via the DataGrid and you want to handle the event InitializingNewItem. You may want to check what the display order of apples is, you can not check via context as the record/s are detached so you have to look in items. The problem is that the new record is of type MS.Internal.NamedObject not Apple.

So you write the following LINQ query
var MaxDisplayOrder = (from Apple a in myDataGrid.Items select a.DisplayOrderNo).Max();

You run it and get the following error exception:
Unable to cast object of type 'MS.Internal.NamedObject' to type 'Apple'.

To solve this problem use OfType method
var MaxDisplayOrder = (from a in myDataGrid.Items.OfType<Apple>() select a.DisplayOrderNo).Max();

Monday, May 31, 2010

.Net 4.0 Framework GAC Location

The location of the GAC has split with .Net 2.0 – 3.5 Framework remaining where it is
C:\Windows\assembly
And the .net 4.0 GAC location is now
C:\Windows\Microsoft.NET\assembly

Monday, May 24, 2010

VirtualBox using Hyper-v VHD image

Tag: Virtual Box Hyperv
I was sick of using windows server 2008 r2 and wanted to move to window 7(now 10). After reading a few reviews it was clear that VirtualBox works very nicely. So I nstalled VirtualBox on a clean windows 7  machine and copied across a VHD. Setup the virtual machine to use an existing hard drive.
image 
Select Next.
Select Memory.
Select Use an existing hard drive.
Select Add icon and select the desired VHD.
image 
Upon starting the virtual machine I received the following blue screen of death:
image
Error Message A problem has been detected and windows has been shut down to prevent damage to your computer.
If this is the first time you’ve seen this stop error screen, restart your computer. If this screen appears again, follow these steps:
Check for viruses on your computer. Remove any newly installed hard drives or hard drive controllers. Check your hard drive to make sure it is properly configured and terminated. Run CHKDSK /F to check for hard drive corruption, and then restart your computer.
Technical information:
*** STOP: 0x0000007B (0x80786b58, 0xC0000034, 0x00000000, 0x00000000)
Solution
The issue is that hyper-v will only build a bootable IDE hard drive. So when you create your virtual machine you need to make sure that you are not booting the VHD under a SATA Controller
image
but instead use the IDE Controller
image

Wednesday, October 14, 2009

Unit testing SharePoint WSS 3.0 x64 bit

Problem
trying to MS unit test code on x64 bit OS with x64 bit WSS 3.0 installed

[TestMethod]
public void TestMethod1()
{
using (SPSite sp = new SPSite("http://localhost:13000/"))
{
Console.WriteLine(
"Site valid");
}
}

Error Message
Test method TestProject1.UnitTest1.TestMethod1 threw exception:

System.IO.FileNotFoundException: The Web application at http://localhost:13000/ could not be found. Verify that you have typed the URL correctly. If the URL should be serving existing content, the system administrator may need to add
a new request URL mapping to the intended application..

Solution
http://community.bamboosolutions.com/forums/t/8179.aspx
download nunit (only 32 bit). Nunit will automatically choose which JIT compiler to use to test the code.

Additional Stuff
Code modification to have both nunit and MS test running together
http://www.martinwilley.com/net/code/nunitmstest.html

#if !NUNIT
using Microsoft.VisualStudio.TestTools.UnitTesting;
using Category = Microsoft.VisualStudio.TestTools.UnitTesting.DescriptionAttribute;
#else
using NUnit.Framework;
using TestClass = NUnit.Framework.TestFixtureAttribute;
using TestMethod = NUnit.Framework.TestAttribute;
using TestInitialize = NUnit.Framework.SetUpAttribute;
using TestCleanup = NUnit.Framework.TearDownAttribute;
using TestContext = System.Object;
#endif

Sunday, August 9, 2009

Silent Install

download here

As a contractor and also some of colleges, end up building a lot of virtual environments. So after installing Biztalk 2009 for the nth time. I decided to automate the Biztalk 2009 installation (and also Biztalk 2006 r2 and ESB 2.0 Toolkit). I started looking at some products that where available on line but nothing met my needs. The requirements that I was looking for:

autologin – some packages that are installed require reboot prior to continuing i.e. sql2008
config – all data to be stored in a config file and easily customizable.
non msi – not have to install it on a clean machine.

So I build Silent Install. Its still a work in progress but its stable enough to get the job done.

Benifits
· Same dev installation across all environments.
· No missing components.
· Reproducible production installs

image

Currently there are 4 options available:
· Install Biztalk 2006 R2 Dev on win 2003
· Install Biztalk 2009 Dev on win 2008
· Install Biztalk 2009 ESB Tool Kit 2.0
· Create Custom Install

As seen below
image

Some installations require a reboot, so your credentials are required for auto login.image

How things work

I create a vhd (Virtual Hard Disk) with all install files copied onto it (size is ~14GB I would like to put it on the net but due to the size and legal issues that will never happen).

image

The way it works is that you figure how to silently install each application by itself, create a batch and sometimes additional ini/xml data files as well. Once you have created each batch file you need to determine in which order to run them.

image

This is then stored in the app.config of Silent Install.
<Environment name="Biztalk2006 R2" Description="Install Biztalk 2006 R2 Dev on win 2003">
  <applications>
    <application order="1" value="IIS6" />
    <application order="2" value="SQL2005" />
    <application order="3" value="Visual2005" />
    <application order="4" value="Visual2005Sp1" />
    <application order="5" value="SQL2005Sp3" />
    <application order="6" value="Reboot" />
    <application order="7" value="Wss3Sp1" />
    <application order="8" value="Biztalk2006R2" />
  </applications>
</Environment>
<Environment name="Biztalk2009" Description="Install Biztalk 2009 Dev on win 2008">
  <applications>
    <application order="1" value="Powershell" />
    <application order="2" value="Reboot" />
    <application order="3" value="PowershellUnrestricted" />
    <application order="4" value="IIS7" />
    <application order="5" value="Office2007" />
    <application order="6" value="Visual2008" />
    <application order="7" value="Visual2008TeamExplorer" />
    <application order="8" value="Visual2008Sp1" />
    <application order="9" value="SQL2008" />
    <application order="10" value="Reboot" />
    <application order="11" value="SQL2008" />
    <application order="12" value="Biztalk2009Prerequisites" />
    <application order="13" value="Wss3Sp1" />
    <application order="14" value="Biztalk2009" />
  </applications>
</Environment>
<Environment name="Biztalk2009ESBToolKit20" Description="Install Biztalk 2009 ESB Tool Kit 2.0">
  <applications>
    <application order="1" value="Biztalk2009ESBToolKit20" />
  </applications>
</Environment>

Installing/Progress Screen
Once the install button is clicked you will be directed to the progress tab and installation will start. image

Running and things to do after install
Assumptions
Clean install of the OS and has been fully patch/updated.

Install Biztalk 2006 R2 Dev on win 2003
   · prompted at start asking location of i386 dir (not sure where the registry setting for that is)
After install 
· Configure Windows SharePoint Services (need to read and understand http://www.mindsharpblogs.com/ben/archive/2008/03/08/4411.aspx
· Disable the Shared Memory Protocol (not sure where the registry setting for that is) 
· Configure BizTalk Server

Install Biztalk 2009 Dev on win 2008
After install
· Configure Windows SharePoint Services
· Disable the Shared Memory Protocol
· Configure BizTalk Server

Install Biztalk 2009 ESB Tool Kit 2.0
· Guide on how to install ESB 2.0 toolkit

Future enhancements
· check if a program has already been installed.
· mount ISO

Tuesday, August 4, 2009

Installing Adapter Pack

WCF LOB Adapter SDK SP2

System Requirements

Supported Operating Systems: Windows Server 2003 R2 Enterprise Edition (32-Bit x86); Windows Server 2003 R2 Standard Edition (32-bit x86); Windows Server 2003 Service Pack 2; Windows Server 2008
Supported Platforms: x86 and x64
Prerequisite Software Requirement
You must install this software prior to installing the WCF LOB Adapter SDK.
a. Microsoft .NET Framework 3.5 SP1
b. Microsoft Visual Studio 2005 or Microsoft Visual Studio 2008

Note: You require this only if you want to either build custom adapters or develop solutions that use the adapters built using the WCF LOB Adapter SDK.

c. Microsoft BizTalk Server 2006 R2 or Microsoft BizTalk Server 2009

Note: You require this only if you want to use the adapters with BizTalk.

Start Installation

1. Download the setup files from the Microsoft Download Center at http://go.microsoft.com/fwlink/?LinkID=96184 to a temporary location on your computer.

clip_image001
2. Run WCF LOB Adapter SDK SP2 x86. exe
3. Set extract location and select Unzip.

4. To start the installation wizard, navigate to the folder containing the setup files and click AdapterFramework.msi (for an x86-based platform) or AdapterFramework64.msi (for an x64-based platform).
If a previous version of the WCF LOB Adapter SDK is detected, you will be prompted to upgrade the existing installation. To continue with an upgrade installation, click Ok; otherwise, click Cancel to exit the installation.

clip_image002
5. On the Welcome screen, click Next.

clip_image003
6. If you accept the license agreement, click Next.

clip_image004
7. In the Choose Setup Type dialog box, select the type of installation you want:

  • To install the run time and tools, click Typical.
  • To select the features that you want to install and the installation location, select Custom.

To install the base WCF LOB Adapter SDK run-time features, select Runtime.

To install the WCF LOB Adapter SDK development tools including the Adapter Development Wizard, Visual Studio Plug-in for generating a .NET Proxy (Add Adapter Service Reference Visual Studio Plug-in) and BizTalk Add-in for generating XML Schemas in a BizTalk Project (Consume Adapter Service BizTalk Project Add-in), select Tools.

To install the sample Contoso and Echo adapters, select Samples.

  • To install all the features, click Complete.

clip_image005
8. Click Install.

clip_image006
9. Specify whether you want to receive automatic updates related to the WCF LOB Adapter SDK; select Use Microsoft Update when I check for updates (recommended), click OK

clip_image007

Installing Microsoft BizTalk Adapter Pack 2_0

1. Download the setup files from the Microsoft Download Center at http://www.microsoft.com/downloads/details.aspx?FamilyID=76736BA7-3C05-4436-9353-1C33F9005194&displaylang=en to a temporary location on your computer.

clip_image008
2. Run Microsoft BizTalk Adapter Pack 2_0 Evaluation x86.exe
3. Set extract location and select Unzip. From the root location of the installation CD, double-click AdaptersSetup.msi (for an x86-based platform) or AdaptersSetup64.msi (for an x64-based platform).

clip_image009
4. Read the information on the Welcome screen, and then click Next.

clip_image010
5. Read and accept the end-user license agreement (EULA), and then click Next.

clip_image011
6. In the Choose Setup Type dialog box:

  • To install the most common features, click Typical.
  • To select the adapters you want to install, click Custom, and then proceed to the next step.
  • To install all the features, click Complete.

    Important
    To install only the adapter that you will use to interface with your enterprise application, you should perform a Custom installation.

    Note
    For this release, Typical and Complete options essentially perform the same action.

    clip_image012
    7. Click Install.

    clip_image013
    8. In the Customer Experience Improvement Program dialog box specify I don't want to join the program at this time and click OK.

    clip_image014

    Configure BizTalk for the new Adapters

    Now that the new Adapters have been installed you expect them to appear in BizTalk Administration Console, nope!

    clip_image015

    clip_image016
    1. Right click on Adapters, select New then select Adapter...

    clip_image017
    2. Select the first adapter in the drop down list WCF-SQL and give it the same name of WCF-SQL

    clip_image018
    3. Click OK.

    clip_image019

    4. Click OK.
    5. Repeat steps on 1-4 for each adapter in the drop down list.

  • Monday, August 3, 2009

    ESB 2.0 Toolkit install batch File

    Assumption

    Assumptions are made that everything is installed on the one server.
    The following applications are installed in their default locations

    · Office 2007
    · vs2008
    · sql 2008
    · biztalk 2009
    · WSS 3.0
    · UDDI is not installed.

    Directory setup

    clip_image002[4]

    Biztalk2009 contains the contents of the biztalk 2009 ISO (for the UDDI install).
    BizTalkESBToolKit2_0 contains all the msi required to install ESB 2.0 toolkit plus an unzip.ps1 script.
    BizTalkESBToolKit2_0\projectFiles contains files that which replace source files to build on x86 platform.

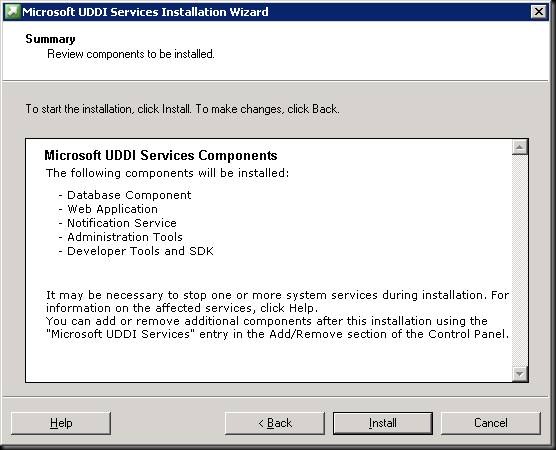
    Installing UDDI
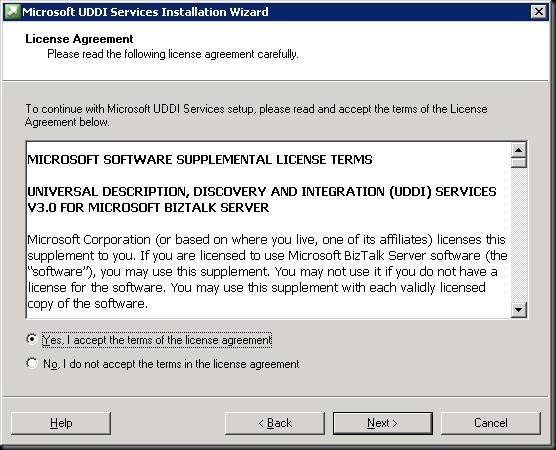
    clip_image002

    clip_image004

    clip_image006

    Uncheck Launch Microsoft UDDI Servers Configuration

    clip_image008

    The configuring UDDI dialog will appear select custom configuration. Make sure that require SSL for publication to this UDDI Services site is not selected
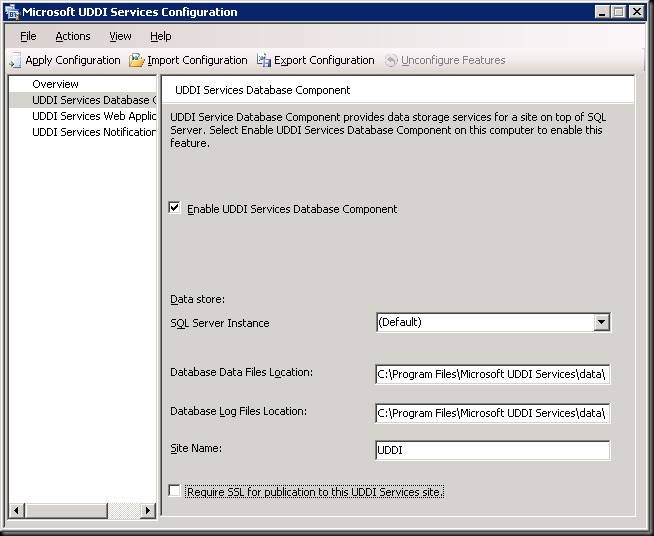
    clip_image010

    clip_image012

    clip_image014

    Apply configuration and close configuration window when finished

    SQLXML 4.0 SP1

    Click Run
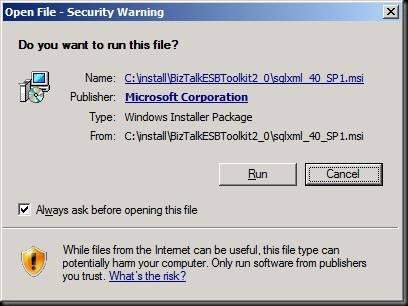
    clip_image016

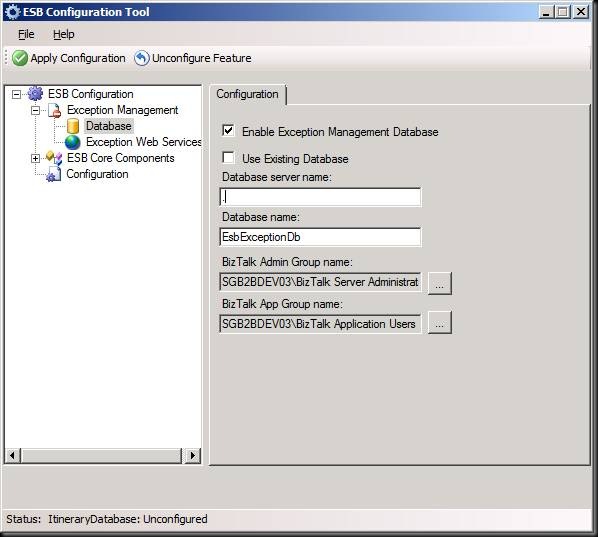
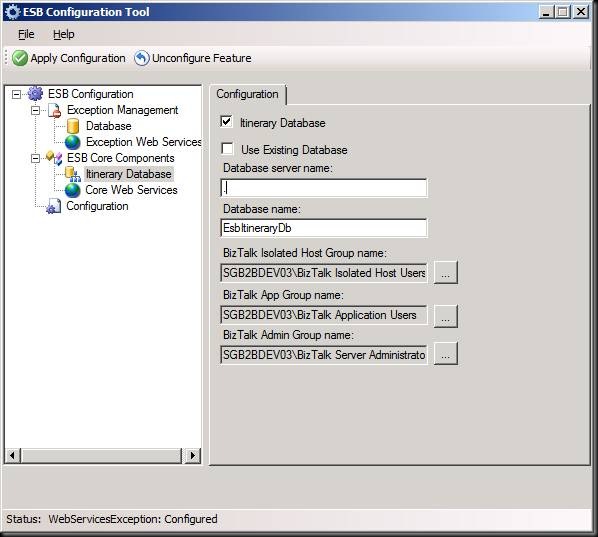
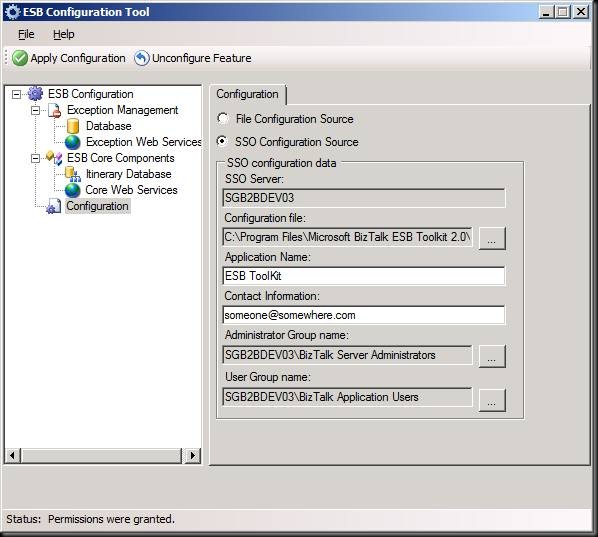
    ESB Configuration Tool

    clip_image018

    clip_image020

    clip_image022

    clip_image024

    clip_image026

    Microsoft.Practices.ESB.UDDIPublisher.exe select n
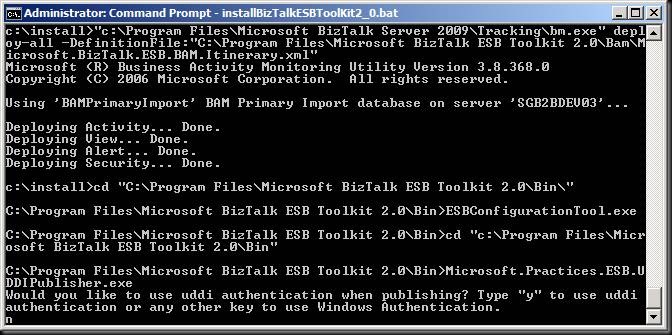
    clip_image028

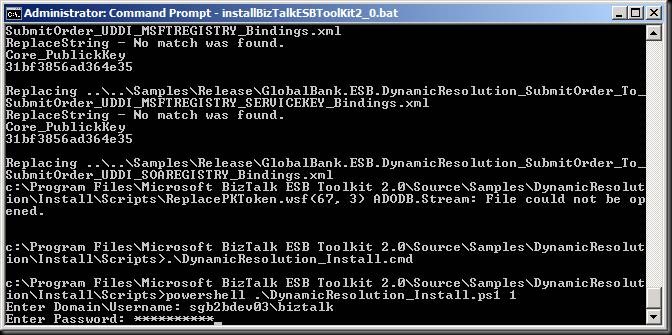
    Dynamic Resolution Install enter username and password for current user
    clip_image030

    Biztalk ESB UDDI Publishing Service
    image

    Batch File Script

    c:
    "c:\Windows\Microsoft.NET\Framework\v3.0\Windows Communication Foundation\ServiceModelReg.exe" -i

    IISRESET

    [BASEINSTALLDIR]Biztalk2009\setup /SetupXml [BASEINSTALLDIR]Biztalk2009\UDDI_x86\Setup.xml
    "C:\Program Files\Microsoft UDDI Services\config\Configuration.exe"

    IISRESET

    [BASEINSTALLDIR]BizTalkESBToolkit2_0\MSChart.exe /passive
    [BASEINSTALLDIR]BizTalkESBToolkit2_0\VsSDK_sfx.exe /passive
    [BASEINSTALLDIR]BizTalkESBToolkit2_0\sqlxml_40_SP1.msi /passive
    "[BASEINSTALLDIR]BizTalkESBToolKit2_0\BizTalk ESB Toolkit 2.0 Docs.msi" /passive
    "[BASEINSTALLDIR]BizTalkESBToolKit2_0\BizTalk ESB Toolkit 2.0-x86.msi" /passive

    BTSTASK Importapp -Package:"c:\Program Files\Microsoft BizTalk ESB Toolkit 2.0\Microsoft.Practices.ESB.CORE.msi" /ApplicationName:Microsoft.Practices.ESB /overwrite
    "c:\Program Files\Microsoft BizTalk ESB Toolkit 2.0\Microsoft.Practices.ESB.Core.msi" /passive

    BTSTASK Importapp -Package:"c:\Program Files\Microsoft BizTalk ESB Toolkit 2.0\Microsoft.Practices.ESB.JMS.msi" /ApplicationName:Microsoft.Practices.JMS /overwrite
    "c:\Program Files\Microsoft BizTalk ESB Toolkit 2.0\Microsoft.Practices.ESB.JMS.msi" /passive

    "c:\Program Files\Microsoft BizTalk Server 2009\Tracking\bm.exe" deploy-all -DefinitionFile:"C:\Program Files\Microsoft BizTalk ESB Toolkit 2.0\Bam\Microsoft.BizTalk.ESB.BAM.Exceptions.xml"
    "c:\Program Files\Microsoft BizTalk Server 2009\Tracking\bm.exe" deploy-all -DefinitionFile:"C:\Program Files\Microsoft BizTalk ESB Toolkit 2.0\Bam\Microsoft.BizTalk.ESB.BAM.Itinerary.xml"

    cd "C:\Program Files\Microsoft BizTalk ESB Toolkit 2.0\Bin\"
    ESBConfigurationTool.exe

    cd "c:\Program Files\Microsoft BizTalk ESB Toolkit 2.0\Bin"
    Microsoft.Practices.ESB.UDDIPublisher.exe
    cd [BASEINSTALLDIR]

    powershell.exe [BASEINSTALLDIR]BizTalkESBToolKit2_0\unzip.ps1 'c:\Program Files\Microsoft BizTalk ESB Toolkit 2.0\ESBSource.zip' 'C:\Projects\Microsoft.Practices.ESB\'

    attrib -r -s -h "C:\Projects\Microsoft.Practices.ESB\\Keys\*.*" /d /s
    attrib -r -s -h "C:\Projects\Microsoft.Practices.ESB\\Source\*.*" /d /s

    [BASEINSTALLDIR]BizTalkESBToolKit2_0\sn.exe -k "C:\Projects\Microsoft.Practices.ESB\Keys\Microsoft.Practices.ESB.snk"

    copy [BASEINSTALLDIR]BizTalkESBToolKit2_0\ProjectFiles\Web.config "C:\Projects\Microsoft.Practices.ESB\Source\Samples\Management Portal\ESB.Portal\" /Y
    copy [BASEINSTALLDIR]BizTalkESBToolKit2_0\ProjectFiles\ESB.AlertService.csproj "C:\Projects\Microsoft.Practices.ESB\Source\Samples\Management Portal\ESB.AlertService\" /Y
    copy [BASEINSTALLDIR]BizTalkESBToolKit2_0\ProjectFiles\Setup.vdproj "C:\Projects\Microsoft.Practices.ESB\Source\Samples\Management Portal\ESB.AlertService.Install\" /Y

    "c:\Program Files\Microsoft Visual Studio 9.0\Common7\IDE\devenv.com" "C:\Projects\Microsoft.Practices.ESB\Source\Samples\Management Portal\ESB.AlertService\ESB.AlertService.sln" /build Debug
    "c:\Program Files\Microsoft Visual Studio 9.0\Common7\IDE\devenv.com" "C:\Projects\Microsoft.Practices.ESB\Source\Samples\Management Portal\ESB.UDDI.PublisherService\ESB.UDDI.PublisherService.sln" /build Debug

    "C:\Projects\Microsoft.Practices.ESB\Source\Samples\Management Portal\ESB.AlertService.Install\Debug\setup.exe" /passive
    "C:\Projects\Microsoft.Practices.ESB\Source\Samples\Management Portal\\ESB.UDDI.PublisherService.Install\Debug\setup.exe" /passive

    cd "C:\Projects\Microsoft.Practices.ESB\Source\Samples\Management Portal\Install\Scripts\"
    Management_Install.cmd

    cd "c:\Program Files\Microsoft Visual Studio 9.0\Common7\IDE\"
    devenv.exe /InstallVSTemplates "c:\Program Files\Microsoft Visual Studio 9.0\Common7\IDE\ItemTemplates\CSharp\1033\ItineraryDsl.zip"
    devenv.exe /InstallVSTemplates "c:\Program Files\Microsoft Visual Studio 9.0\Common7\IDE\ItemTemplates\VisualBasic\1033\ItineraryDsl.zip"